Oil painting is a slow-drying painting method in which pigment is suspended in drying oil and applied in controlled layers to a prepared surface. I think of it as a system rather than just a paint type: pigment, binder, support, ground, and layer order all shape the result. This article explains how the medium works, which materials matter most, how painters build a surface, and why those choices affect both appearance and long-term preservation.
The medium works because slow drying, layered control, and surface structure all matter at once
- Oil paint cures by oxidation, so it stays workable much longer than acrylic.
- The support and ground matter as much as the paint because they influence stability, absorbency, and texture.
- Techniques like glazing, impasto, scumbling, and alla prima create very different visual effects.
- Compared with acrylic, oil gives more blending time but requires stricter layer planning.
- For older works, craquelure, yellowed varnish, and flaking paint are the main condition cues I look for.
Why oil paint behaves differently
At its core, oil paint is pigment held in a drying oil, usually linseed, walnut, safflower, or poppy. The crucial point is that it cures by oxidation; it does not simply lose water and harden the way acrylic does. That is why an oil layer can stay open long enough for blending, corrections, and soft edges that would be difficult to sustain in faster media.
That slow behavior is also why the support matters. A painting on stretched canvas, linen, a rigid panel, or prepared paper will age differently because each surface flexes, absorbs, and responds to handling in its own way. The ground, the preparatory layer between support and paint, is just as important: it seals the surface, gives the paint something to grip, and can make the final skin smoother or more toothy.
Oil painting is not automatically glossy, and it is not automatically traditional-looking. Surface sheen depends on the oil content, pigment load, medium, and whether the work is varnished. Thin passages may feel dry to the touch in a few days, while thick impasto can remain vulnerable for months before the film is truly hard. Once you understand that, the material choices start to read as structural decisions rather than cosmetic ones, which leads directly to the tools and layers underneath the image.
The materials that control the paint film
Tate describes oil paint as pigment suspended in a drying oil, which is why the medium remains workable far longer than most people expect. I usually tell students to pay attention to four things: binder, support, ground, and medium, because together they determine how the paint film, the hardened layer of paint, will behave over time.
- Binder - Linseed oil is the workhorse choice because it forms a strong traditional film. Walnut, safflower, and poppy oils are often chosen when a paler handling or less visible yellowing matters more than maximum toughness.
- Support - Linen canvas is valued for stability, cotton is more economical, and wood panel adds rigidity. The less the support moves, the less stress the paint film has to absorb.
- Ground - The ground sits between support and paint. Acrylic gesso is common today, while traditional oil grounds can feel smoother and are often chosen when a less absorbent surface is wanted.
- Medium and solvent - Medium changes flow, transparency, and drying behavior; solvent thins paint but should be used sparingly because too much can weaken the film and complicate cleanup.
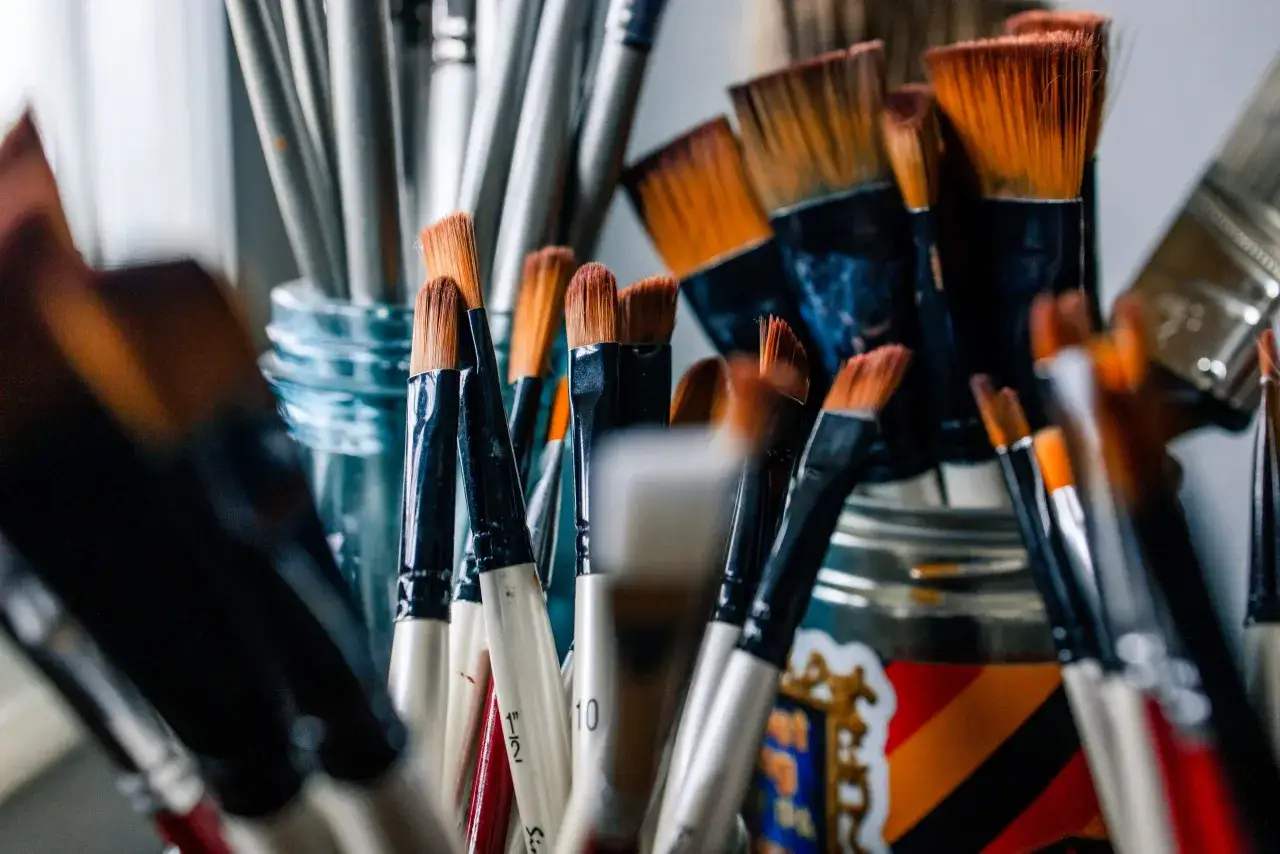
- Tools - Brushes, palette knives, rags, and a stable palette matter more than beginners expect, because technique is partly about how cleanly you can move from a thin block-in to a finished surface.
Once the surface is prepared, the painting itself becomes a sequence of controlled decisions rather than a single act, and that is where the layering logic matters most.
How an oil painting is built layer by layer
The classic workflow is usually slower than people imagine. I start with the idea that each layer should solve one problem and not try to solve everything at once. That restraint is what keeps the surface readable and reduces technical mistakes later.
- Prepare the support - Prime the canvas or panel so the paint does not sink into the fabric or wood.
- Set the drawing or block-in - Place the main shapes, values, and proportions before detail takes over.
- Develop the middle layers - Refine edges, temperature, and value relationships while the surface is still open to revision.
- Use the right handling for the effect - Glazing adds transparent depth, impasto builds thick relief, scumbling softens or breaks color, and alla prima keeps the painting wet and direct in one session.
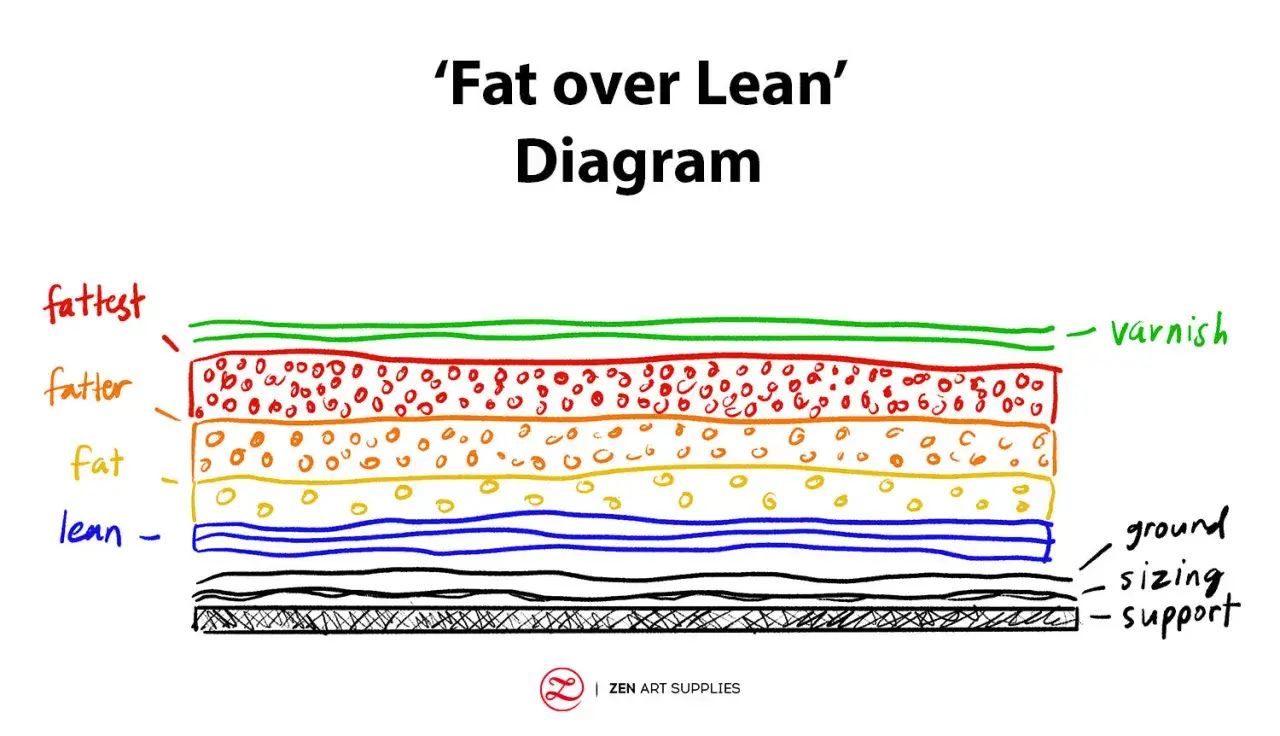
- Respect fat over lean - Later layers should usually contain more oil than earlier ones so the upper film remains more flexible than the layers beneath it.
- Let it cure before varnishing - Dry to the touch is not the same as fully cured, and thick passages may need a long time before they are ready for a final varnish.
The single rule I see ignored most often is fat over lean. When a lean, brittle layer sits above a richer, more flexible one, cracking becomes much more likely. That is the kind of failure that appears slowly, so I prefer to treat layer order as a structural decision, not a style preference. With that foundation in mind, the next question is why painters still choose oil when faster media are available.
Why artists return to the medium and where it pushes back
In my view, oil painting earns its reputation because it gives the painter time. That time lets edges soften naturally, skin tones stay subtle, and glazes build a depth that feels physically embedded in the surface. It also supports a wide range of finishes, from thin atmospheric passages to dense, sculptural strokes.
But the same qualities come with costs. Oil paint can feel slow if you want quick revisions, and thick passages can stay vulnerable to dust or pressure long after the surface looks dry. Cleanup is less forgiving than with acrylic, and if the paint is rushed, over-thinned, or applied on an unstable support, the medium can crack, wrinkle, or yellow in ways that are hard to reverse.
- Best when you want layered color, subtle blending, and a surface that can hold visible brushwork.
- Hardest when you need speed, portability, or frequent overpainting on a deadline.
- Most common beginner mistake is assuming the surface is dry because it no longer feels tacky.
- Most expensive mistake is building a beautiful image on a weak ground or moving support.
That trade-off becomes clearer when you set oil beside other painting media and look at what each one is actually optimized to do.
How it compares with acrylic and watercolor
I do not rank these media as better or worse. They simply serve different timing and surface goals. Oil is the medium I would choose for slow modulation and layered depth; acrylic is the medium I would choose when speed and practical cleanup matter; watercolor is the medium I would choose when transparency and paper texture are central to the image.
| Medium | What it does best | Main limitation | Best fit |
|---|---|---|---|
| Oil | Long blending time, rich glazing, strong surface depth | Slow curing and more demanding layer discipline | Finished paintings that rely on subtle transitions or visible paint body |
| Acrylic | Fast drying, easy cleanup, flexible studio workflow | Short blending window and less open manipulation | Work that needs quick turnaround or repeated adjustments |
| Watercolor | Luminous transparency and direct mark-making | Harder to correct and more dependent on paper quality | Light-filled, paper-based work with a more immediate look |
If the image depends on slow color shifts or layered opacity, oil usually has the edge. If the image depends on speed, acrylic often wins. The point is not to pick a champion; it is to match the medium to the visual problem, and that same logic helps when you look at older paintings through a conservation lens.
The clues that tell an oil painting is aging normally
When I look at older paintings, I separate normal aging from active damage. Fine craquelure, the network of small age cracks, a soft yellow cast in old varnish, and some surface dulling are common enough that they do not automatically signal trouble. What matters more is whether the cracks are stable, whether the paint is lifting, and whether the support is still holding its shape.
- Fine, even craquelure can be normal, especially in older oil paintings.
- Freshly lifted edges, tenting, or powdery flaking are not normal and deserve attention.
- Yellow varnish can shift color balance, so a cool passage may look warmer than it originally was.
- Canvas slackness or panel warping is a structural problem, not just a visual one.
The Met’s conservation guidance is useful here because it shows how often treatment is about structural repair rather than cosmetic polish: removing discolored varnish, mending a tear in the canvas, or securing flaking paint. That is a reminder that an oil painting is a layered object, not a flat image. My practical rule is simple: do not treat surface gloss, grime, and varnish as the same problem. A painting can look tired without being endangered, and it can look presentable while still carrying hidden instability. If you want one habit that protects both artists and collectors, it is this: read the structure first, then judge the image.